I am still behind on my cleaning (which ends in 2 days) and I don’t know if “catching up” is really doable now. I may just have to keep going into May. BUT we did have a super productive weekend!
First, Friday, my wonderful in-laws let us borrow their truck and then spread mulch in our front flower bed. And by borrow, I mean, they picked up the mulch on their way in too. We decided to buy a “bucket” full of mulch. I had to ask what exactly a “bucket” was when I called and he said “a bob-cat bucket.” Arielle said when they picked it up, she didn’t think it was that big… until they started dumping it in the truck bed. I really should have taken a picture!
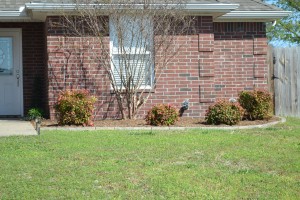
This is possibly the first time we’ve actually had enough mulch in this bed too. But with this much mulch, Ansen and I spent this afternoon filling the canal that the bricks are in with sand and raising them up so they can actually contain all of the mulch and be seen from the street. It’s really too bad I don’t have a before picture, but here’s after:
Today, I worked on some brackets for shelves in the office. Thanks to Andrew, who showed me how to use my circular saw, I cut my own wood for them as well! Originally, I had purchased some (expensive) metal “L” brackets for an idea like this:
I really love how this looks and it would have worked perfectly… but the ones I bought were too small for what I needed and they would be much more expensive to buy big enough ones. They’re like $7 or more per bracket and I needed 4.
So I settled for something more like this because it was considerably cheaper.
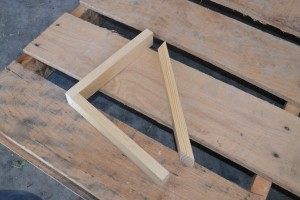
I got two 6′ pieces of 1×2’s of whiteboard (the cheapest kind at Lowes) for around $3 each. To begin, I cut the wood for these. Two are 9″ and one is 9″ on the short side with 45 degree cuts on the end.
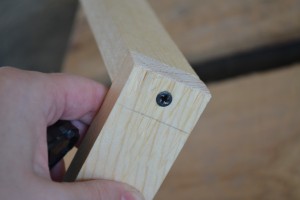
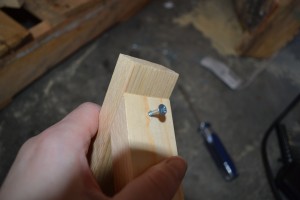
Then I secured the two end pieces together, first by pre-drilling first through the short side, then marking through the drilled hole with a mechanical pencil (lead waaaay out) and then pre-drilling down into the longer piece.
Then I screwed a nice long screw through both.
I put the angled piece in and measured it’s distance from the corner to ensure that it was centered angle-wise. (Remember geometry? It’s a right triangle, one 90° with two legs of equal length and then two 45° angles.)
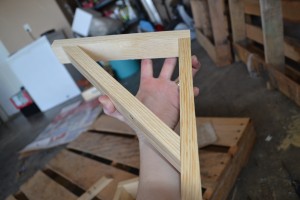
I pre-drilled the angled piece so that the screw would go more easily and at the angle I desired. I then screwed a shorter wood screw through until it was flush and it caught the straight piece nicely. I suppose if you really didn’t want these to be seen, you could have screwed them from the other direction, but I was afraid my screws wouldn’t be long enough and this worked well enough for my purposes.
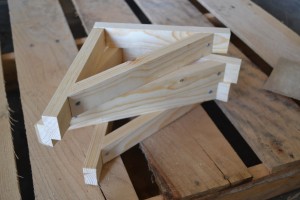
After doing this for both sides… we have these
Now all that’s left to do is paint them, a nice bright melon color to contrast against the gray walls (whenever they finally get painted). Oh, and I guess I have to figure out how exactly to hang them. The width I need them won’t allow them to be on studs. Any suggestions? Are wall anchors strong enough for 10 or so pounds?
*EDIT* Here’s the painted version… and the finished product.
And what post would be complete without a sweet picture of Avie eating her first funnel cake at the Dogwood Festival this weekend?
Love this girl!




Where did you get those cool boxes on the shelf??? I love the shelf and the idea of hanging your bottles underneath! Glad you got your mulch in too!
That’s actually just an idea photo I found on Pinterest… so not sure where they got those boxes. But they sure are cute! I’m planning to do something a little different. I’ll post pictures when I finally get them up!
Avie’s picture didn’t show up?