Owls are currently a pretty popular baby theme (birthday, nursery, you name it). I hear they’re on their way out and that foxes are the new big thing. Either way, I wanted to do something sweet, but not typical. And since we have a little Avelea WREN and we call her the Avelator (sounds like Aviator) and there are just so many aviary references… we went with a birdie theme. The problem is, since it’s not popular, it’s hard to find the stuff for it! Just in case you’re in the same boat. Here’s how we pulled it off!
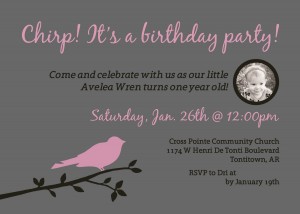
It all started with this beautiful card that my hubby created:
He designed this in photoshop (because he’s that cool). And then we had them printed from Walgreen’s. The trick was that we should have ordered them sooner. They take quite a while to ship them to you if you chose to have them printed on cardstock instead of photo paper. Basically, Walmart or Walgreen’s both do “photo card” prints where you can upload a picture (or in this case, a JPEG with Ansen’s design). They’ll print them in an hour if you chose photo paper. They take quite a while longer if you chose the cardstock. Walmart’s are cheaper, but Walgreen’s is faster, so we opted for Walgreen’s. Either way, you have to order them in packs of 20, which was actually perfect for what we needed. We have 2 extra and since there are pictures on the back, it’s perfect for the scrapbook.
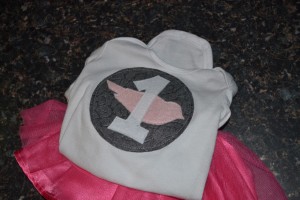
Next, Avie needed something to wear:
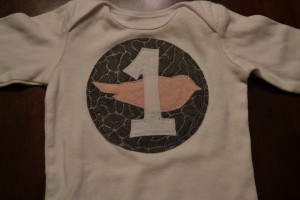
I started by cutting out some felt shapes. I used the birdie from her invitation as the template, a bowl and then I used Word and my computer screen to find the number 1 I liked best to trace. I cut the shapes out of sewable iron on adhesive (I suggest HeatnBond, because you can find it anywhere!) Then I ironed them onto the felt and cut around the shapes until I had these 3 pieces.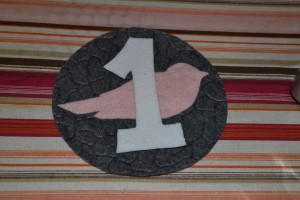
Then, because it’s actually pretty hard to sew while on the shirt, I actually finished the circle first. First, I ironed the bird to the circle where I wanted it. Then, using my sewing machine, I sewed around the outside of the bird with a very narrow seam (like 1/8″). You have to take the backing off of the circle part to do this, but be sure to return it when ironing on the “1”… or it will be stuck to your ironing board. (Don’t worry, I didn’t do that.) After returning the backing to the circle, I ironed the 1 on, took the backing off and then sewed around the 1 as I did the birdie.
Lastly, I ironed the circle to a white onesie (just from a 3 pack at Walmart) and then sewed around the circle. This can be a little tricky because those little shirts are so tiny and it’s easy to catch the back in the stitching. But I finally managed to get it all the way around.
Perfect with some grey & white striped leggings and a pink tutu!
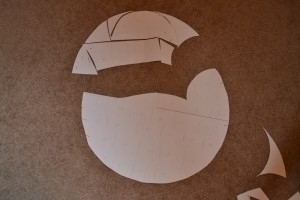
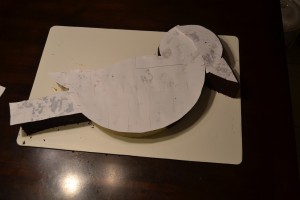
Now the cake! We could have just done a sheet cake from Walmart/Sam’s but they’re kind of pricey when you’re already feeding 25-30 people lunch. We could have made our own sheet cake and decorated it with a bird. But, I thought I’d make my life nice and complicated and figure out how to make a shaped cake. In a recent Martha Stewart Living Magazine (don’t judge, it was free), I saw all kinds of shaped cakes; bears, owls, fish, poodles. I searched high and low for how to make a bird shaped cake. Nothing. The internet is void of bird shaped cakes. Thus, I am sharing mine. We (my mom and I) messed with several ideas, from cutting it out of a sheet cake to different sizes of circle cakes and finally decided that a 16″ round cake would give us enough cake for everyone and be just the right shape for a bird. So, to figure out how to cut it, I started with a 16″ round circle of paper.
Then, I cut the body out…
And from the remaining scraps, the rest of the head and a beak…
And finally a wing and a tail…
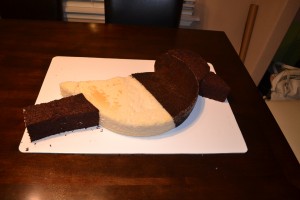
Friday, my mom came and helped me make the cake (with her 16″ round cake pan). Everything was going swimmingly. We poured 2 white and 2 chocolate cake mixes in from opposite sides at the same to make a perfectly half and half cake. We put it in to bake (which took forever!) and pulled it out when it was finally done. Or so we thought. It looked beautiful at first, but a few minutes later, the front half (nearest the door, and the coolest place in the oven) fell. While most of the cake was done… the front wasn’t. We had forgotten to turn the cake halfway through baking. Silly us. But we managed to salvage a majority of it by cutting the body around the fallen portion.
We had to make 2 more 12″ cakes (this time chocolate, because if I’m going to have left over cake, I want it to be chocolate!) to cut the head, beak & tail with. Why 2? Well, because the 16″ cake pan makes a 3″ cake. The 12″ cake pans are only 2″ tall. Thus, we had to stack them to get the height to match. Before we cut anything, though, we put the cakes in the freezer. It definitely makes it easier to cut!
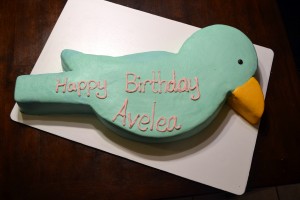
So here’s the final bird before icing. Yay!
Icing was a little tedious and time consuming. I found a youtube video on how to make buttercream look like fondant (because buttercream definitely tastes better). So we used the biggest piping fitting my mom had (borrowed from a friend) and put the icing all over the cake. Then we smoothed it with an icing spatula. That part is tricky because it kept pulling the frosting off. We tried dipping the spatula in hot water, but that just made the frosting wet. Finally, we got to the smoothing part. Basically you take a Viva (or other cloth like paper towel), put it lightly on the cake, and smooth with your hand or a fondant smoother, then you gently peel the paper towel off. Butter cream is surprisingly moldable if it’s set a little and it isn’t too hot in the area you are working. You can’t use a regular paper towel, because it will stick, but the cloth like ones work pretty well. You also can’t use it on wet frosting (from where we had smoothed it with the hot water), but once it’s dry, you can. It was rather time consuming, but we managed to get it almost completely smooth.
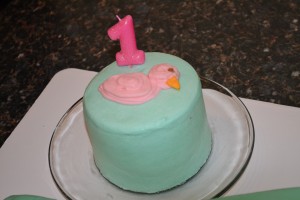
Lastly, Avie had her own smash cake!
I did the butter cream just like the big cake. Then I used a big circle piping tip (like the kind they use on all of those cupcake shows) and drew a little bird. I formed a tiny little beak in my hand with some of the orange from the big bird’s beak and stuck it on. Lastly, the little eye was another ball of buttercream we had added some brown to. A mini chocolate chip would have worked to, but I didn’t have any.
All in all, everything turned out really well. And we only stayed up until 1am working on the cake… so not too late. Regardless, Avie had a great bird-day!

