I think I forgot to tell you about the slouchy shirt I made.
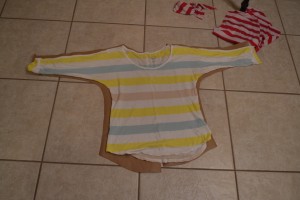
This is the shirt that I bought from Old Navy and I love it. It’s the perfect slouch, just loose enough, but not entirely shapeless. So I traced it to some postal paper. (I buy it by the roll from Dollar Tree and use it for SO many things! From patterns to table cloths you can draw on, to covering diaper boxes, it’s the best!) I tried to trace a 1/2 inch outside of the fabric to give seam allowance. (I didn’t quite succeed and the shirt ended up being slightly more snug, especially in the arms, so I will allow for more next time. You can always take some off, but you can’t add it back.)
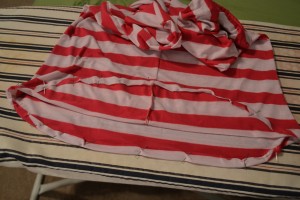
Then I cut it in half. One for the front and one for the back. The back, on the left, is longer and doesn’t have quite a scooped of a neck. It’s the basic outline with no alterations. The front, on the right, I cut the neck line a little lower, but left the shoulder starting at the same point. I also cut the bottom slightly shorter, but kept the side hem starting at the same place.
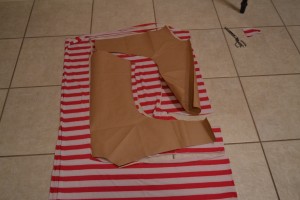
Next, I folded the fabric in half. I place the front on the fold (so that it’s one whole piece) but the back, I placed where it would fit. I didn’t want to waste perfectly good fabric just so I could get them both on the fold. The original shirt had a seam down the back, so it worked out well. (Note to self, add a little extra seam allowance on the edge of the back. This may have been part of the problem.)
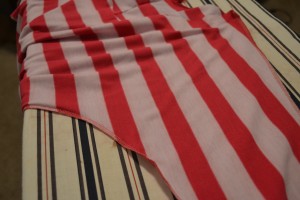
I may have sewn the right side and the wrong side together instead of right sides together. This may, or may not be the proof of that.
The correct way to assemble this shirt is to lay right sides (if using knits, look for the v’s, they are the “right side” of the fabric.) of the back pieces together and sew the middle seam. Then place the right sides of the front and back together. Sew the shoulders from the neck to the end of the sleeve. Then sew from the sleeve to the arm pit and down the side of the shirt for both sides.
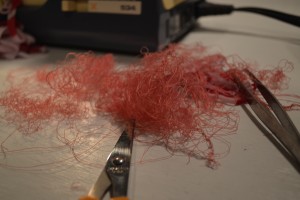
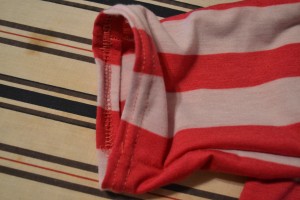
This is the arm. To the left is the top of the shoulder and the curve is the arm pit. I did mine with a serger because it’s easier to get a pretty seam with. But it’s kind of a pain if you mess up. (Like I may, or may not have done.) There are some excellent tutorials on the proper way to rip serger stitches. Thank goodness for those. If you’re using a regular machine, no worries. You can either sew a straight stitch and then zigzag again to get the serger effect, or you can straight stitch and cut the fabric to 3/8″ or a little less. Jersey knit will roll and keep it from fraying.
At this point. Try it on. You can fix mistakes before the finishes, but it’s a lot of work to fix later.
The sleeves were a bit tricky. I rolled them twice and pressed them. Then I used a double needle on my regular machine. Because it’s stretchy, I had some issue with the two stitches pulling and becoming puckered. There’s probably a way to fix this with tension or something, but my machine is about 24 years old and tension is sort of relative on it anyway.
Next, I rolled the bottom twice and pressed it and pinned it as well. With the curvature of the bottom, this was even more tricky than the sleeves proved to be. Since I was using a twin needle, I needed the right side to be top side, which meant that the bottom side, that I needed to keep an eye on to make sure it stayed folded properly, was not visible. Rather than just forging ahead and causing myself a headache (already did that once!) I decided to do a bast stitch. Basically, I used white thread (easily visible) with the biggest stitch possible and sewed wrong side up all the way around. Then, I flipped it over, did my pretty twin stitch without a whole lot of cursing. And then I removed the basting stitches (hence the white, easily visible for easy removal).
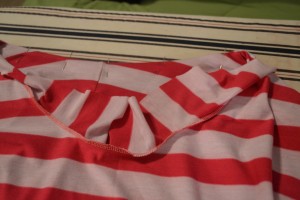
For the neck, it again, stole from the tutorial I used on my previous shirt. Basically, you cut a piece of fabric to the same shape as the neck, a few inches wide. If you have plenty of fabric to work with, lay a rectangle under the front so that it’s a few inches below the scoop of the neck (right sides together). Then, cut it to the shape of the neck and pin. Do the same for the back. You’ll have to sew these 2 pieces together at the sholders, but then you can just sew around the neck (on the wrong side). Once sewed, you flip the shirt right side out, tuck the extra fabric inside and press to make a nice fold. This keeps the fabric from gathering (like the bottom hem would) and makes everything lay nice and flat. Then top stich this pressed neckline.
Once it’s top stitched and pretty, cut off any extra fabric hanging inside. Any remaining will roll up and keep from fraying, but you don’t want much left or you’ll end up with a worm around your neck!
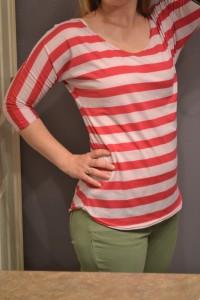
And the finished product! The sleeves are a little snug and I think I’m going to make the neck a little more narrow next time, but I love this style of shirt. I think I may have to make more! And now that summer is almost here, I think I may need some like this, but tanks and short sleeves. If I get around to them before fall, I’ll post them here too!

