Nesting this time around does NOT mean sanding and staining a crib and changing table/dresser. Because luckily, I’ve already done that. But it does mean moving big sister into a new big girl bed. The thing is, I didn’t like the style of a lot of twin bed frames that are relatively cheap. AND the skimp on the space underneath for storage. So I decided to build my own, loosely based off of several tutorials I found. Like this Instructable and this Anna White for a Queen bed.
This is what I came up with
My supply list:
4 – 1x2x8 – supports, ledger board & topper
1 – 1x2x6 – ledger board
1 – 1x4x8 – foot board top/bottom
1 – 1x4x6 – front legs
2 – 1x4x10 – frame
2 – 1x4x4 – back legs & head board top
2 – 2×4 1/4″ plywood – backer board for head and foot board
2 – brackets
3/4″ screws
1 1/2″ screws
2 1/2″ screws
1 quart white paint
Total = $86.03 (after all the returns and such)
Already had:
wood filler
paintable caulking
I started by measuring the end boards very scientific way, by holding them up around the mattress. I marked them and made sure they were the same length and cut. The long boards are the 1x2x10’s cut to 74″ and the short boards are the remaining parts. They were cut to approximately 38″.
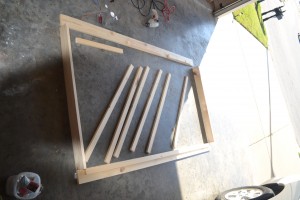
Next I laid out the long and short frame boards after cutting. The short end boards go on the inside and the long pieces go on the outside. Then measured and cut the middle supports the same as the end boards to go on the inside. These are 3 of the 1x2x8’s to make six supports.
I used the scraps of the first 3 for one side’s support ledger. On the other side, I used the 1x2x6 whole. With the scrap pieces, I spaced them out evenly across the bottom of the side board. With the whole piece, I simply centered it. These were flush with the bottom and screwed in with 3/4″ screws. The supports will sit on top of these.
After attaching the ledger boards on the two long sides of the frame, I attached the frame together. Again, the short ends were on the inside. The pink mark is on the long side of the frame. I used 2 1/2″ screws to and drilled a pilot hole to ensure that this was a sturdy joint.
Next, to sturdy up the frame, I laid out the support beams and screwed them in with 1 1/2″ screws into the ledger board. Pre-drilling pilot holes helped to keep the supports from splitting. The frame itself is now complete! On to the food board and headboard!
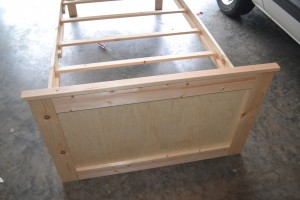
First I created the box for the Farm House look. The two side pieces were the 1x4x4 cut exactly in half. The top and bottom were the 1x4x8 cut to fit between these two when square with the frame (really exact, I know!).
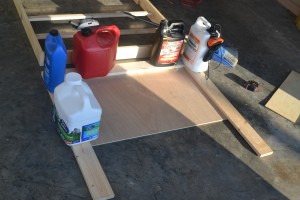
This part was a bit more tricky because I don’t have a pocket hole guide :( So I opted for the glue it and screw it method. After cutting the 1/4″ plywood to fit length wise (it already fit the height perfectly), I laid it all out and glued the boards to it.
And since I don’t own clamps, I used what I had… heavy stuff.
Since I didn’t want screws from the front side, I opted for a more concealed approach. After it had dried sufficiently, but before it was completely set, I flipped it over and screwed from the back side, using 3/4″ screws, making sure to sink the screws below the surface so I could fill them later.
I understand there could be some concern that the top and bottom boards aren’t actually screwed into the vertical boards, however, all the weight of the bed is on those vertical boards and there should virtually never be any pressure on either the top or bottom board. They’re mostly for decoration.
The top frame is pretty much the same, only without a bottom board. I used the 1x4x6, cut in exactly half for the legs and a 1x4x4 for the top bar. Again, the top bar was simply measured from the inside of each leg when square with the frame. (I made a booboo and thought the 1x4x8 would be enough for all 3 pieces I needed and it would have been if my original measurements worked, but they didn’t… so this 1x4x4 meant a second trip to Lowes.) I glued it the same and screwed from the back side, sinking the screws so I could use wood filler later.
Now to assemble. My original plan was to simply screw the frame to the head and foot boards. But I worried there might occasionally be a lot strain on those screws. So I decided to beef it up just a bit with this little bracket, screwed to the bottom of the long side of the frame and to the leg of the head and foot boards from the back side. These were attached at a height of 12″ so that there would be storage under the bead. These brackets give the frame something to sit on, in addition to the 1 1/2″ screws I used to secure it to the head and foot boards. It may be overkill, but occasionally mommy and/or daddy may need to sit on the bed too.
Here it is put together. At this point I also added the nice little topper from the remaining, 1x2x8. Each was cut to hang over the end about a half inch so it’s 1″ longer than the total footboard. I screwed it in from the top, sinking the screws so I could fill them later.
On to the finishing touches. I filled the sunken holes with wood filler, let them dry, sanded and then filled again, dried again and sanded, just to be sure they were smooth. I also used paintable (important distinction) caulking on the seams of the face of the foot board and head board. I simply used my finger and a damp cloth to work it in. I still wanted to see the seams, but I didn’t want gaping holes. So this finished well. Then I painted the whole thing white. With 3 coats. I should have used primer and maybe I could have done 2 coats, but I didn’t want to spend the extra on primer.
Final product! But we won’t get into the crazy that is adjusting to the big girl bed just yet. That’s another post.
I’ll end with the important lessons I learned on this project:
1. Use the right tools for the job. I forgot my circular saw had went kaput until I was literally ready to get started and had a full day planned for working on it. Luckily I have a jig saw and a steady hand, so I managed to get these cut fairly decently, but a circular saw would have definitely made this easier.
2. I also learned to do things in the right order. Follow the order I lay out here, not what I actually did. Don’t decide to caulk the edges after you’ve already painted 2 coats, you’re just making more work for yourself.
Obviously this is a bit big for her room now. But now that she’s been sleeping in it for a while and has gotten used to it, our next big nesting project is to switch the office with the nursery so that the kiddos will have the bigger room to share.


